Tuesday, December 27, 2011

Christmas present (passed)


Better late than never, I guess.... I did get my Christmas tags into the hands of recipients by Christmas Eve (except Joyce, who didn't visit her mailbox on Saturday), although it may have been too late to be of use this year. Oh well, everyone said they were too pretty to part with, so hopefully by next year, they'll adorn some gifts.

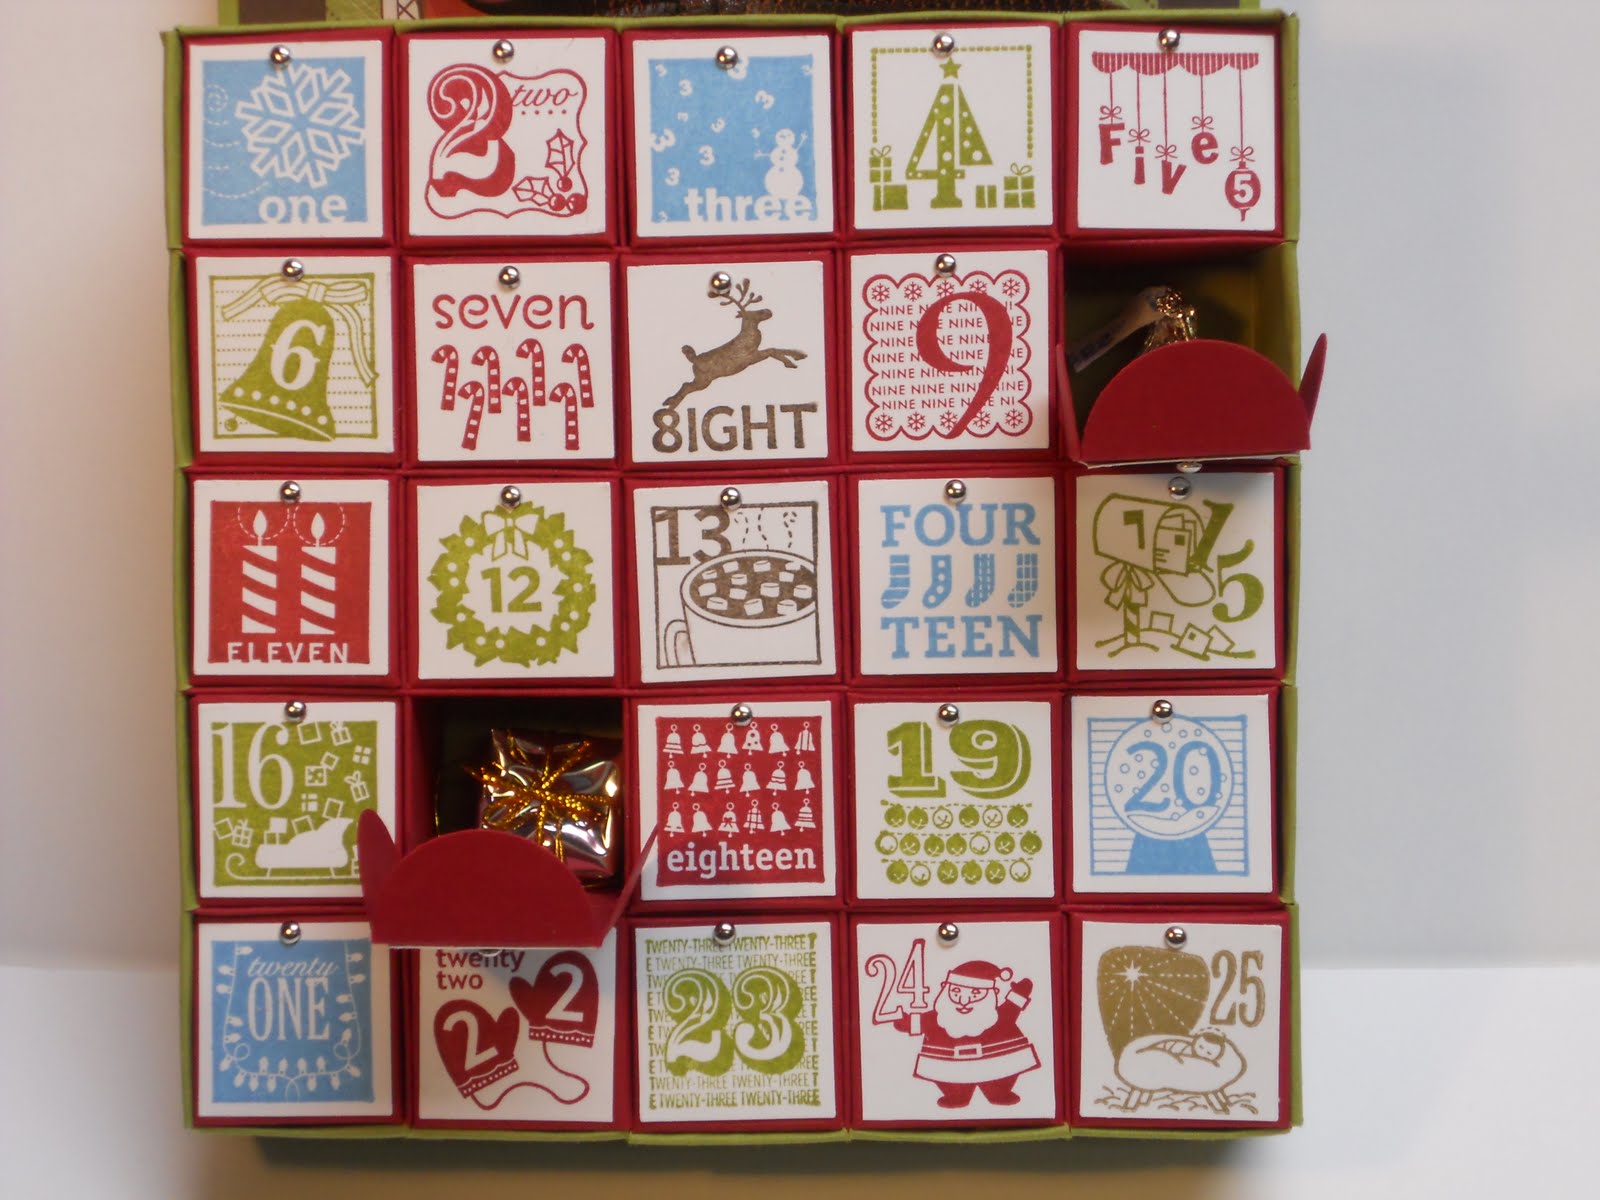
I think the boxes were the best part. I have thought about this little image, Sweet Snowglobe, since last year (when I ran out of time). This year I finally got it just like I wanted, by handcoloring the stamp with Riding Hood Red, Lucky Limeade, Early Espresso and Baja Breeze markers, and accenting the snowflakes with Dazzling Details. I stamped the base separately and embossed with pewter embossing powder, snipped it out and layered onto the card. Love the glass glitter snow inside!

I made boxes in several colors of textured card stock; I think I like the Old Olive the best, although the (retired) Blue Bayou looked very nice with the Baja Breeze.

I made up a few last-minute one-of-a-kind tags to add in a couple boxes. (I never did get around to finishing the stocking tags... oh well, there's always next year....)


I only mailed cards to two of my aunties... I hope they got them by Christmas.


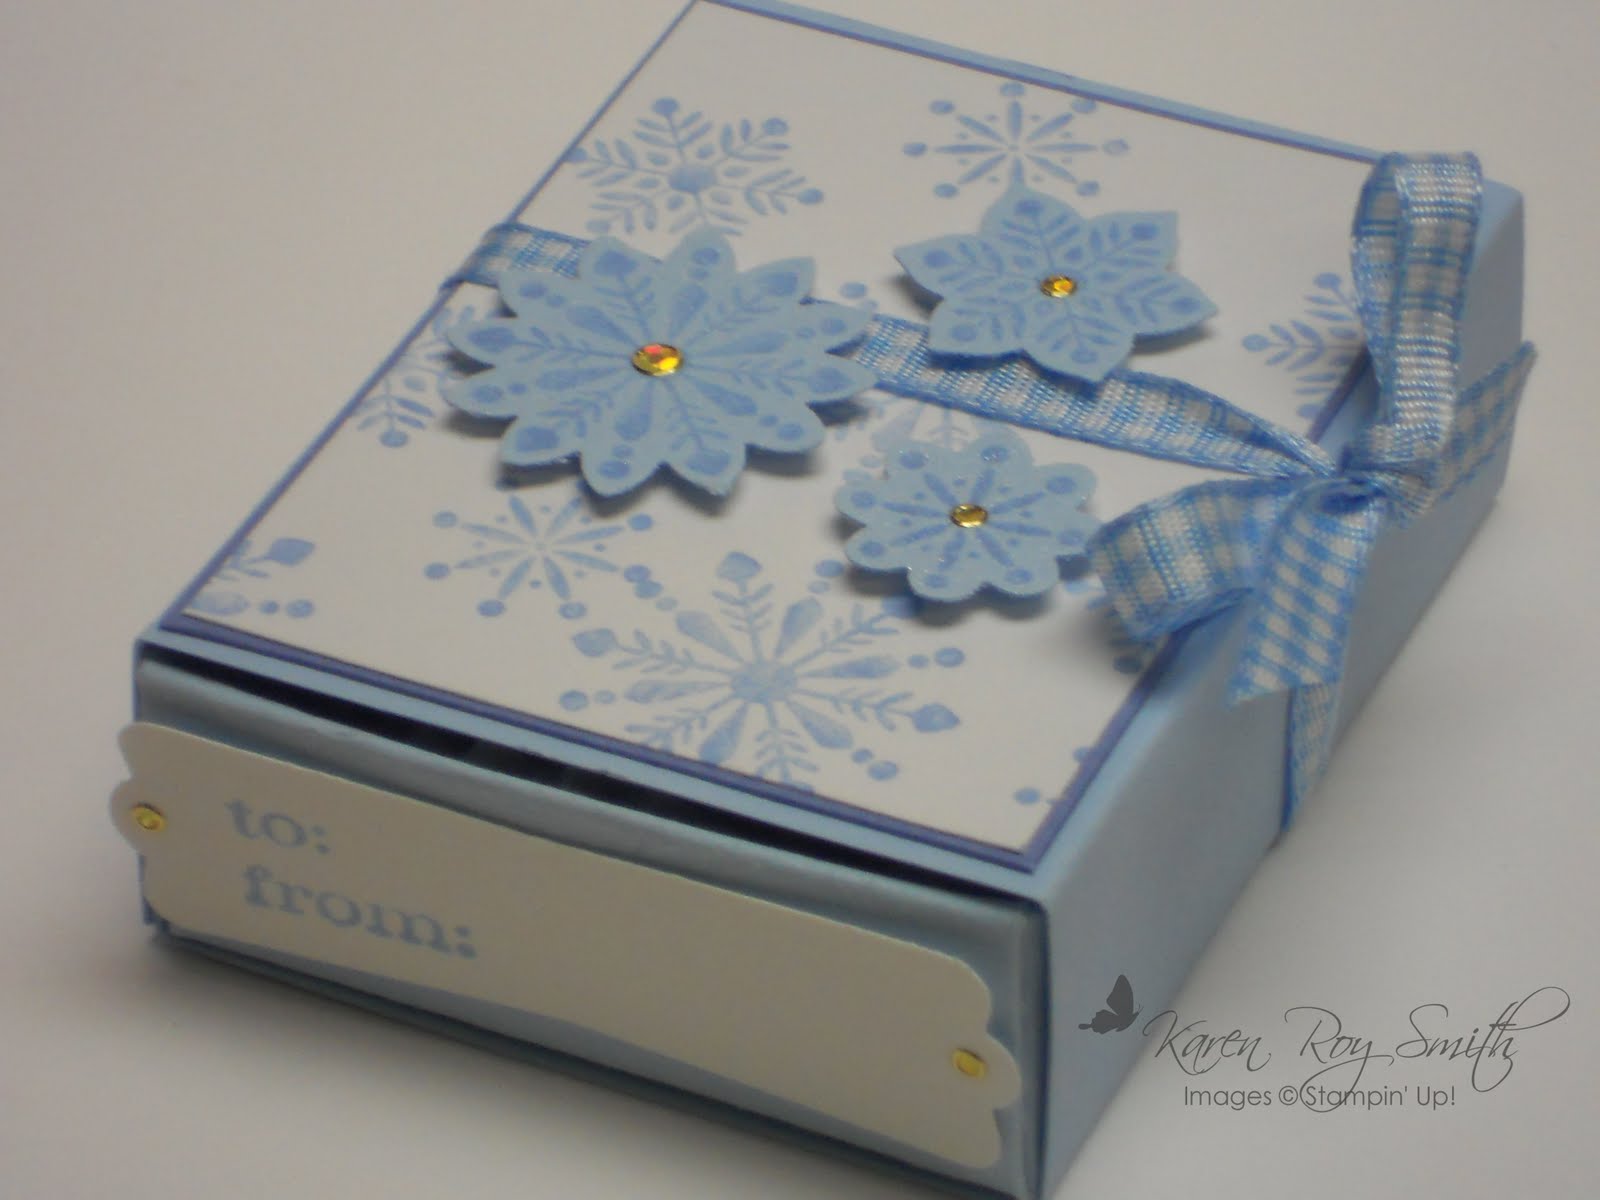
I really love this Marina Mist/Cherry Cobbler plaid... so different and pretty.


And last but not least, here's a trio of cute little hexagonal boxes made with the Mini Milk Carton Bigz die:
Well, that's it for my Christmas creations for this year. I still have several ideas kicking around my work table; I wonder if I'll get a jump-start on next year's projects or if I'll just pick up all the pieces and clear up the considerable mess... I'll let you know!

Saturday, December 24, 2011

Angels on high

I love angels. I have a feeling that angels are all around us. Maybe it's a vestige of my Catholic grammar school days, but I like the sense of protection I feel when I think of Archangel Michael, or the tenderness in the message delivered by the Angel Gabriel. I often think that angels manifest through people, through friends and kind strangers, and perhaps that's why I like to imagine them among us.
I love thinking about the angels announcing the birth of the Christ child to the shepherds in their fields (Hark! The Herald Angels Sing is one of my favorite Christmas carols). The big, beautiful angel at the top of our Christmas tree brings this glorious image to mind.


I'm not sure how Santa got mixed up in this holy day, but I like to think of him as a magical angel fulfilling children's fantasies. I just hope he shows up with presents to finish decorating our tree!

Wishing you a merry, magical, and mystical Christmas!

Monday, December 12, 2011

Stocking stuffers

I've had a lot of fun with this Holiday Stocking Bigz XL die. These cards have a little surprise: the tag in the pocket pulls out to reveal a gift card (which I'll attach with a little removable adhesive).

The candy cane really pops with the chunky red glitter, and the tiny jingle bell is just so cute.


I've made several of these in various color combinations. It's hard to pick my favorite, but this might be it. I just love River Rock and Riding Hood Red together, and the little lace border adds a soft, pretty touch.


The tag can be removed and used as a gift tag or a bookmark - or it can remain in the card to be used again next year! I'll attach a separate name tag when it's time for gift-giving.


I got some 6 x 9 catalog envelopes from Staples to hold these cards. Since I don't intend to mail them, I can embellish to my heart's content!


Love this Cherry Cobbler and Wild Wasabi combo, too, especially that gorgeous Frost Lodge DSP. I'm not usually a fan of plaids, but these are beautiful.


I think these stockings will make giving gift cards a lot more exciting!


Thursday, December 8, 2011

Winter wishes

Well, it's not quite winter, yet, but we all know it's coming. Each year I try to think of something to add to my list of things I like about winter (it's a short list). I like wreaths, especially this tiny one with the glittery berries.


I stamped the wreath image in Pear Pizzazz and the berries in Riding Hood Red, with some Dazzling Details glitter glue to accent the berries. I cut the Whisper White and Riding Hood Red from PTI's Mat Stack 3 dies; for the card, I used the Mega Mat Stack 3 die and placed a piece of folded Old Olive just inside the left edge, to make a folding card. (The layers fit the card well but the photo makes it look a little unbalanced - it's not.) The dots are dry embossed with a Texturz plate. The Riding Hood Red taffeta ribbon is retired, sadly; it is one of my favorites but I use it sparingly. The little tag was stamped and cut using Tiny Tags and the jewelry tag punch; "to you" is just a part of a larger sentiment stamp.


I just love this little card, which could be mailed in a regular envelope, or used as a gift tag. This reminds me of another item to add to my list: I love making holiday cards.


What do you like about winter?

Tuesday, December 6, 2011

Taggin' along

There are plenty of things I ought to be doing... but I'd much prefer creating little treasures in my craft room. This little snowman shaker tag is so much more fun than folding laundry!

Most of the tags I make are created out of pure whimsy... looking to put a few little design elements together to make a pleasing whole. I might start out with a particular idea, but chances are it will change into something completely different before I'm through. That's part of the fun!

This little poinsettia and pine bough tag is an exception: I wanted to do something with the Pool Party tag, and I knew I wanted some sort of red. Since I tend to favor Riding Hood Red and Cherry Cobbler as my favorite reds, I looked to something a bit brighter for this 5-piece flower, made from several layers (from a PTI Flower Fusion die and several punched flowers) all snipped between the petals to give some great texture. Poppy Parade was perfect! The pine bough is also from a PTI die, cut twice and layered, with the top bristles tweaked upward for a great 3-D accent. As you can imagine, this particular tag was a lot more labor intensive than many of the others, but I love it!

Some of the tags were spritzed with glimmer spray, like holiday wishes (above) and Dasher, which was also stamped with shimmer paint.

I absolutely adore this little snowman from My Favorite Things; some watercolor accents is all he needed. The candy cane was cut from the Stocking Accents Original die; I then colored every other strip with a Versamarker and heat-embossed with Cherry Cobbler embossing powder. A little messy but cute.

Each tag is stamped, either on the front or the back, with "To" and "From" to make it easy to identify a gift recipient.


I'll admit I like the little glass microbead snow much better than the real thing!

Thursday, December 1, 2011

Countdown to Christmas


"He's making a list and checking it twice..."

When I saw this Advent calendar, I knew I wanted to make it. I'd seen other versions of calendars using the set 25 & Counting but nothing really struck me; I'd also been toying with an idea of making a calendar using the candy wrapper box die. But this calendar is made using the Petal Card punch - which I love - so it didn't take me long to decide. I made three of them for each set of my nieces and nephews.

This is nearly a complete copy of Brenda Quintana's design; she was so generous to share her terrific tutorial at http://qbeesquest.blogspot.com/2011/10/inch-box-advent-calendar-tutorial.html. Thank you so much for both the fabulous box design and the equally excellent tutorial!

I just finished making the third one last night and hope to deliver it tomorrow, to Katherine and Michael. I gave one to Aidan and Jake at Thanksgiving, and Toots brought another one to Paige and Max.

There were a lot steps to create these adorable boxes-in-a-box but it was truly fun. The hardest part is to find treats small enough to fit 2 to a box - remember, we're sharing.... Most of the boxes hold candies but a few have miniature ornaments, like these little packages.

(Don't tell: there are two tiny gold angels behind this door!)


I hope my nieces and nephews enjoy counting down the days in December and looking forward to celebrating a Christmas full of love and good cheer!

Tuesday, November 29, 2011

Boxes and baubles


This is one of a trio of little boxes I made from the Matchbox Bigz XL die and some retired papers, accessories and colors (Pool Party, although you are pretty, you are no Soft Sky, madam).

Actually, the next one is Bashful Blue. Each box has a drawer full of white shred and a removable tag (for easy writing). Perfect for those "good things come in small packages" type of presents!


Tags, tags, tags. I love making tags. I think a good deal of that comes from when I was younger, I spent an inordinate amount of time wrapping each gift to look perfectly beautiful, complete with a meticulously-tied bow. The problem I had came, not with finding a gorgeous paper - good paper has always been available - but with finding a wonderful tag to accompany my gift. It always took a lot of shopped stores until I found decent tags. Well, I've solved that problem.


Even though I think this Concord Crush tag is lovely, I only made one. Believe it or not, this little tag, cut with the new Peekaboo frames Bigz die, is harder to make than it looks: I had to adhere a piece of card stock to the back side of the frame, along the narrow edges, and then trim the piece to the same shape as the frame. It didn't look right with a square back (yes, I know, it is the back, but still) but cutting a second shape with the die didn't work since the inner frame piece is cut away as well.

I'll be back soon with some more small boxes and tags. 'Tis the season, after all!

Friday, November 25, 2011

Giving thanks


A bright and festive label is such an easy way to turn a plain bottle into a pretty gift, although I had to repunch the circle openings to accomodate the larger bottle top... Give Thanks is from (retired) Holiday Best.

Did I say I love this French Foliage set? It makes is so easy to fill in a beautiful background. (I know, I know, I forgot the beautiful big striped grosgain ribbon in Old Olive...)


We enjoyed our Thanksgiving dinner this year at a new locale, and while our past celebrations have always been fun and meaningful, they also involved an enormous amount of preparation, cooking and clean-up for my sister Judie and me. This year, I made the green beans and a bag full of treats to share, lent a hand in the kitchen, and did a round or two of dishes - and had plenty of time to sit and visit with my loved ones! That was a pleasant change from tradition! A great big thank-you to our hosts Debbie and Harry Smith, and to their son Matt Smith, the fabulous cook!


The more delicate shapes of these leaves were cut with small steel dies; I thought they were from PTI but can't find mention of them. I roughly stamped them with similarly-shaped (retired) Autumn Leaf Prints in Versamark. I diecut a little leaf in the pillowboxes and lined the opening with window sheets. (I cut the leaf on the wrong side; I wished the flap openings were facing the back - oh well, I'll know better next time.)


So here's my sophisticated photo set-up: I put two halves of an artist white sketch pad on top of a basket, lit by two dimming fluorescent fixtures and shoot with my Nikon 4 Coolpix S4000, no flash... And I was too tired to set up a bigger background for the larger tableau, so the shelves of wooden SU stamp sets make up the backdrop... (I would normally crop the background out, if necessary, when I add my watermark - which I forgot to do in these photos! All images are copyrighted by Stampin' Up!)

Not the greatest lighting, but not the worst, and it's a quick set-up - on top of whatever stamps and inks I have scattered about underneath - for a last-minute, late-night photo. Sometimes I forget to turn the flash off and the result is a brash, over-exposed shot, like below.


I totally forgot to photograph the inside, which was rolled with the beautiful jumbo Stampin' Around Bright Blessings in Versamark ink; then I rubbed various shades of pearl powders which adhered to the ink after I buffed away the excess. (Note to self: I should recreate this and post an additional photo.) Hershey's Nuggets were covered in labels stamped in various colors with Give Thanks from It's a Wrap Holidays and tucked inside for a little take-home treat.

Added December 6: I found two unassembled but stamped boxes under my work paper (I knew I had 16 of these to start with!!) Glad I didn't have to remake the whole thing!


I am so thankful for my beautiful family and friends and of having had the opportunity to spend a happy day of sharing and celebration with them.


Here's to sharing our love and gratitude!