Tuesday, November 29, 2011

Boxes and baubles


This is one of a trio of little boxes I made from the Matchbox Bigz XL die and some retired papers, accessories and colors (Pool Party, although you are pretty, you are no Soft Sky, madam).

Actually, the next one is Bashful Blue. Each box has a drawer full of white shred and a removable tag (for easy writing). Perfect for those "good things come in small packages" type of presents!


Tags, tags, tags. I love making tags. I think a good deal of that comes from when I was younger, I spent an inordinate amount of time wrapping each gift to look perfectly beautiful, complete with a meticulously-tied bow. The problem I had came, not with finding a gorgeous paper - good paper has always been available - but with finding a wonderful tag to accompany my gift. It always took a lot of shopped stores until I found decent tags. Well, I've solved that problem.


Even though I think this Concord Crush tag is lovely, I only made one. Believe it or not, this little tag, cut with the new Peekaboo frames Bigz die, is harder to make than it looks: I had to adhere a piece of card stock to the back side of the frame, along the narrow edges, and then trim the piece to the same shape as the frame. It didn't look right with a square back (yes, I know, it is the back, but still) but cutting a second shape with the die didn't work since the inner frame piece is cut away as well.

I'll be back soon with some more small boxes and tags. 'Tis the season, after all!

Friday, November 25, 2011

Giving thanks


A bright and festive label is such an easy way to turn a plain bottle into a pretty gift, although I had to repunch the circle openings to accomodate the larger bottle top... Give Thanks is from (retired) Holiday Best.

Did I say I love this French Foliage set? It makes is so easy to fill in a beautiful background. (I know, I know, I forgot the beautiful big striped grosgain ribbon in Old Olive...)


We enjoyed our Thanksgiving dinner this year at a new locale, and while our past celebrations have always been fun and meaningful, they also involved an enormous amount of preparation, cooking and clean-up for my sister Judie and me. This year, I made the green beans and a bag full of treats to share, lent a hand in the kitchen, and did a round or two of dishes - and had plenty of time to sit and visit with my loved ones! That was a pleasant change from tradition! A great big thank-you to our hosts Debbie and Harry Smith, and to their son Matt Smith, the fabulous cook!


The more delicate shapes of these leaves were cut with small steel dies; I thought they were from PTI but can't find mention of them. I roughly stamped them with similarly-shaped (retired) Autumn Leaf Prints in Versamark. I diecut a little leaf in the pillowboxes and lined the opening with window sheets. (I cut the leaf on the wrong side; I wished the flap openings were facing the back - oh well, I'll know better next time.)


So here's my sophisticated photo set-up: I put two halves of an artist white sketch pad on top of a basket, lit by two dimming fluorescent fixtures and shoot with my Nikon 4 Coolpix S4000, no flash... And I was too tired to set up a bigger background for the larger tableau, so the shelves of wooden SU stamp sets make up the backdrop... (I would normally crop the background out, if necessary, when I add my watermark - which I forgot to do in these photos! All images are copyrighted by Stampin' Up!)

Not the greatest lighting, but not the worst, and it's a quick set-up - on top of whatever stamps and inks I have scattered about underneath - for a last-minute, late-night photo. Sometimes I forget to turn the flash off and the result is a brash, over-exposed shot, like below.


I totally forgot to photograph the inside, which was rolled with the beautiful jumbo Stampin' Around Bright Blessings in Versamark ink; then I rubbed various shades of pearl powders which adhered to the ink after I buffed away the excess. (Note to self: I should recreate this and post an additional photo.) Hershey's Nuggets were covered in labels stamped in various colors with Give Thanks from It's a Wrap Holidays and tucked inside for a little take-home treat.

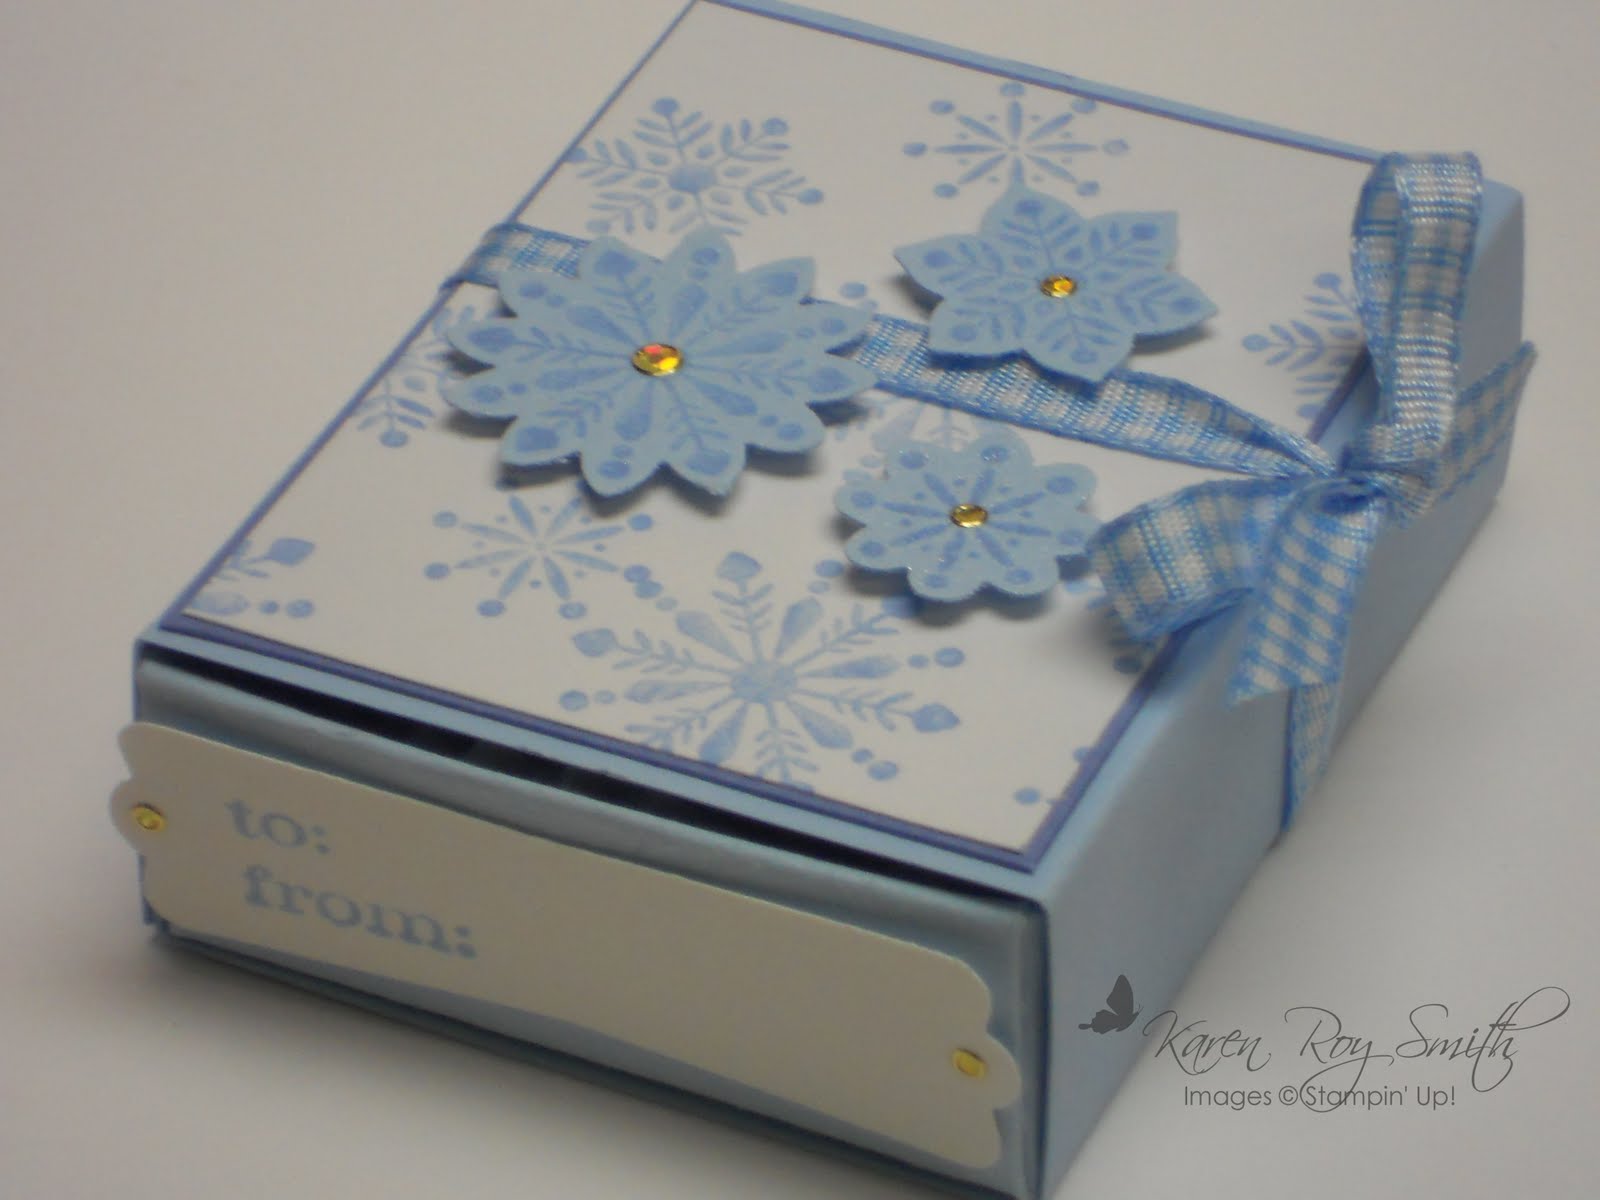
Added December 6: I found two unassembled but stamped boxes under my work paper (I knew I had 16 of these to start with!!) Glad I didn't have to remake the whole thing!


I am so thankful for my beautiful family and friends and of having had the opportunity to spend a happy day of sharing and celebration with them.


Here's to sharing our love and gratitude!

Thursday, November 24, 2011

Grateful

Remembering to remain grateful can be a full-time job around here. Nevertheless, this sentiment is so true. Being grateful for all I have is a great way to get happy.

Something that made me happy recently was FINALLY capturing these turkeys on film. For several weeks, I had passed this big flock of about 30 birds on my way to and from work each day. They were culling a harvested corn field and I really wanted to take a photo. There's not a very good place to stop, though, and a few times, I cruised back and forth trying to pull over, but something always stopped me: once it was some construction vehicles in the way; another time, I had driven past for a while, feeling late for work, but then decided to turn around and go back, only to find the turkeys had moved into the woods; one time, just as I was about to pull over, a work truck pulled over right in the space I had scoped out. Eventually, I succeeded, even though the photos aren't all that great. I am so glad I did, too, because the next day, they were gone!


(I bet these fat, corn-fed birds would be grateful to know they are protected!)

The leaves are from French Foliage; I stamped them on Naturals White card stock in Tangerine Tango, So Saffron and Crumb Cake and rock-and-rolled them in Cajun Craze, River Rock and Early Espresso. I also used the splatter image in Crumb Cake for a little more textural interest. I stamped the sentiment, from Pursuit of Happiness, onto vellum, punched it out with the Curly Label punch, and attached it with a cute little leaf brad from Creative Impressions. The mat layer is Cajun Craze and I mounted it on an Always Artichoke card that was hanging around which matched the bit of twine that finishes off this simple but pretty card.


I think the sentiment inside is from (retired) All Year Cheer .


Wishing you a very Happy Thanksgiving!

Thursday, November 10, 2011

Tis the season


I've been busy making cards, boxes and tags to give away to my family and friends this holiday season. Here's a really cute little hexagonal box made from two milk carton die cuts.


I love the shape, and the size is nice - it's about 3 inches wide, 2 inches deep. Time to put some of my hoarded DSP to good use!


I'll post some more boxes and tags soon!


Monday, November 7, 2011

Holiday cheer

I finished up a couple of wine tags in time to enter Andrea Walford's Makeover Monday contest, but to my disappointment, the link is closed. (I'll try emailing her the link to this post...)

My tags are smaller than the one she demonstrated; I was inspired by Mary Fish's recent post demonstrating bottle tags.


The first one I made using Cherry Cobbler and Wild Wasabi. I embossed the top layer using an old Fiskars embossing plate; I like the way it looks with the swirls on the circle tag stamped using PTI's Tag-Its #9, which was mounted on a larger circle. The "holiday cheer" and holly sprig stamp are also from this lovely little set.

I wrapped a piece of (retired) Wild Wasabi striped grosgrain ribbon around the tag and tied it off with a piece of Cherry Cobbler baker's twine. The snowflake was cut from silver glimmer paper using the Northern Frost Sizzlets decorative strip die, and the holly leaves were cut from Garden Green using the Stocking Accents die - I added a little score line for interest - with berries punched using a small circle punch. The tag was stamped using Tiny Tags and punched with the jewelry punch; a small rhinestone added some extra bling.


The second tag is quite a bit simpler, and I think I just might like it best. I embossed the Riding Hood Red layer with the Texturz Backgrounds 1 and layered a piece of (retired) Riding Hood Red 1 1/4" striped grosgrain ribbon (love it!). I added the circle frame stamped from the (retired) Vintage Labels, punched with the smaller scallop punch. "be merry" is from Tag Its #9 and the little poinsettia is from an unidentified retired set. A couple of jingle bells tied to some rustic twine adds a cute finishing touch.


I think these will pretty up the bottles of wine and champagne I plan to bring to our holiday get-togethers this year, don't you think?

Wednesday, November 2, 2011

Christmas wishes

Linda organizes regular workshops in which she prepares the materials for her guests to make several card designs to donate to Cards for Soldiers, which sends the blank cards overseas for our military volunteers to use to keep in touch with their loved ones. This week, her workshop focused on Christmas cards. Since I couldn't make it, I prepared a couple of designs myself and will send them to her for inclusion with her package.


These cards use the Holiday Stocking Bigz XL die. I cut some from Riding Hood Red and Old Olive, first folding the card stock and placing the fold just under the top cut, resulting in a folding card design. I embossed the red one using the Snow Burst Textured Impressions embossing folder. I cut the top, heel and toe from Crumb Cake, added a (retired) Riding Hood Red ribbon loop, which I covered on the back with another piece of Crumb Cake cut to fit over the stocking top. The snowflake was cut using Northern Frost Sizzlet Decorative Strip die, and the holly and berries were cut with the Stocking Accents Original die.

The sentiments on this card come from a lovely old (retired) set called Spirit of the Season which were embossed using white embossing powder.


The Old Olive card was stamped in Versamark with the Medallion stamp and embossed with clear embossing powder. I also embossed the stocking top, toe and heel using the Perfect Details Texturz embossing plate. The Early Espresso Quilted Satin ribbon was attached using a little button brad from Vintage Trinkets and a couple of punched accents. "Merry Christmas" was punched with the Modern Label punch. The stocking "lace" comes from PTI's Edgers #2 die.

These sentiments are from the (retired) A Cardinal Christmas stamped in Early Espresso. (The photo color didn't come true on the inside of the card; it really is Old Olive!)


I've included some large envelopes (6" x 9") for these large cards but since they're light and don't have extra bulk, they still only require regular first class postage (44 cents until the next rate hike!)


I hope our brothers and sisters in the armed services enjoy sending their Christmas wishes!